Linear actuators are popularly used in a wide range of applications. Venture Mfg. Co is one of the leading and trusted manufacturers of linear actuators. The main purpose of these devices to is to allow easy and effective movement of the movable parts of an equipment in a straight line. There are a number of parameters involved in the movement of an actuator, which decide working capability of the device.
Venture’s linear actuators consist of limit switches, which are used to control the stroke length of the device. To understand how to operate the limit switch settings, let us first understand what stroke length is. This will help you in understanding the limit switch adjustments effectively.
What is a Stroke Length?
The stoke length of an actuator refers to the length that the device will travel. It is a quantitative term, which defines the total working length of an actuator. The stroke is measured by extending and retracting the actuator. It is important to know the minimum, maximum, and optimal stroke length for the safe operation of actuator, as well as the mechanism to which it is connected.
How to Adjust the Limit Switch Settings of Your Venture Linear Actuator?
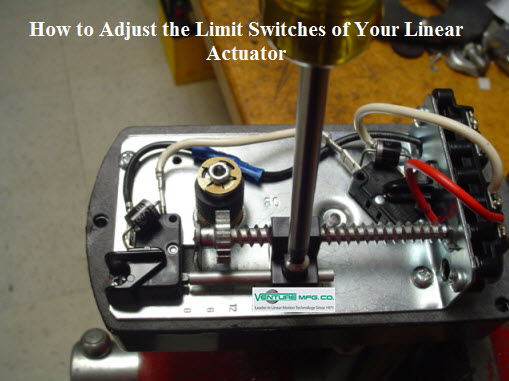
By following the simple steps given below, you will be easily able to adjust the settings of the limit switches of your Venture actuator:
- Step 1: Retract the Actuator: As the first step in adjusting the limit switches, retract the Venture actuator to the lowest possible position. Consider consulting Venture Mfg. for the minimum retracted position. Do not exceed this minimum value as it can cause the product to jam.
- Step 2: Adjust the Limit Switch: There are different types of limiting switches, such as a rotating screw, travelling nut, and a disc. If the switch is of travelling nut type, then turn the nut until you hear the switch click. This helps ensure that the switch is set at the extreme position. This is the lower most extreme position.
- Step 3: Extend the Actuator: Now that we have one limit set, extend the actuator to the opposite extreme. Similar to that the first step, consult the manufacturer for the maximum extended position.
- Step 4: Adjust the Limit Switch Again: Repeat Step 2 to set the limit switch at the other extreme position. This is the upper most extreme position.
- Step 5: Checking the Limit Switch: This is the final step of adjusting the limit switches of your Venture actuator. In this step, you need to ensure whether the switches are set properly, and check whether there are any drifts in direction. To check this, run the product or application. If it runs smoothly without any problem, then it means that the limit switches have been set correctly.
Things to Bear in Mind as You Adjust the Settings…
There are certain things to bear in mind before you go on adjusting the switches to the desired value. These things to consider are as follows:
- The process of adjusting the limit switches explained in this post is applicable only when the actuator is fully assembled and fully retracted.
- Another thing you need to make sure is that as the actuator is operated under power, its inner tube does not rotate.
- Remember to use the clutch, else it might damage the gears and the dc gearbox, when the actuator is retracted or extended under power.
This is how you set the desired stroke length using the limit switches of your Venture actuators effectively. Do you want to know more on the topic? You can always talk to Venture Mfg. Co., who have helped clients to maximize the advantage of their actuator.